Color Efex Pro comes in three different versions: Standard, Select, and Complete. Each version shares the same interface and functionality, but varies in the number of filters included (15, 35, and 52 respectively). A list of of which filters come in each version can be found at Nik’s Website.
![]()
I’ll be using the Complete Edition as the basis for this review. Most of what I’ll be talking about will apply to any version, unless I mention a specific filter.
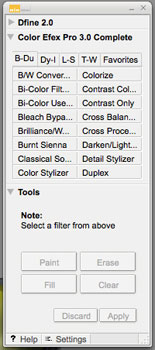
Color Efex Pro opens as a toolbar in Photoshop (pictured right). This toolbar lists all the filters available alphabetically, and accesses to the selective tools if you choose to apply the filter as a layer mask. Once you select a filter from the list, it launches the User Interface. The UI is completely redesigned from Color Efex Pro 2.0 and is much more intuitive (pictured below).
The left side of the interface shows you all of the filters available. The nice thing about Color Efex 3.0 is if you selected the wrong filter or you decide you’d rather apply a different one, you no longer have to re-launch the user interface. They’ve also added tabs where you can view all of the filters or sort them by four different categories: Traditional, Stylizing, Landscape, and Portrait. There’s also a Favorites tab where you can keep your most frequently used filters.
![]()
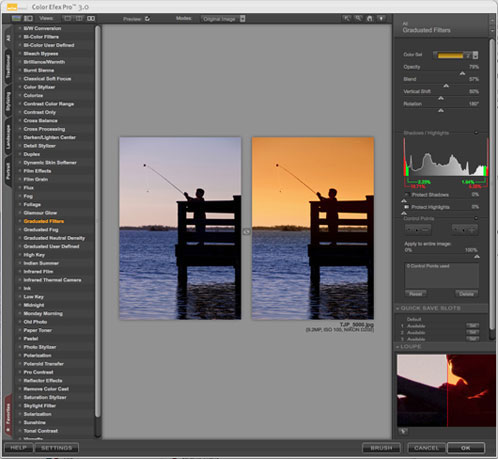
Color Efex Pro 3.0 User Interface: Graduated User Defined Filter
The center portion of the interface gives you a preview of how your filter effect is being applied. You can sort between viewing only the filtered image, splitting the image horizontally or vertically, and doing a side-by-side before/after view.
The right side of the interface contains all of the options for how the filter is applied. At the top you’ll find all of the sliders specific to the filter you currently have selected. A new feature with the filters is you can store up to four “quick settings” per filter. This makes applying your favorite slider combinations very easy. Just below that are the sliders to recover lost shadow or highlight detail. These give you a live view of the histogram, detail that is close to blown out, and lost detail.
The next set of controls is perhaps the most innovative feature in Color Efex 3.0: the control points. The control points allow you to selectively apply or remove the filter effect to a specific part of the image based on color. The other cool feature with the Control Point tab is you can choose how much the effect is applied to the overall image. These features are extremely useful and can save a lot of time layer masking in Photoshop.
When you apply the filter to the image, it appears as a new layer within Photoshop. If you use the brush function to apply the filter, it appears as a layer mask and is fully functional with all of the Photoshop brush tools.
Most of these filters provide very tasteful enhancements to your images instead of completely transforming them. There are a lot of very practical filters including graduated color/ND filters, sunshine, foliage enhancement, skylight, brilliance/warmth, vignetting, white neutralizer, and one of my favorites: dynamic skin softener.
At the same time, there are filters to help you control contrast, tone, or convert your images to black and white, simulate film, and add grain. Even though you can do a lot of these enhancements in Photoshop already, Nik streamlines the process by allowing you to get the results you want at the click of a button.
Overall, I think Nik Color Efex Pro 3.0 is a worthwhile addition to any photographer’s Photoshop workflow. The software ranges from around $99.99 to $299.99. My advice would be to visit Nik’s website, see what filters are included in each version, and buy the one with the filters you would want to use most. You can purchase Color Efex 3.0 directly from Nik Software.